Running Your First Scan
Your first scan may come from a one-off CLI run or from a connected agent. In either case, the goal is the same: start small, confirm the scope, and verify that the results look right before expanding.
Where To Watch It
Use the Jobs page to watch scan progress and inspect the result.
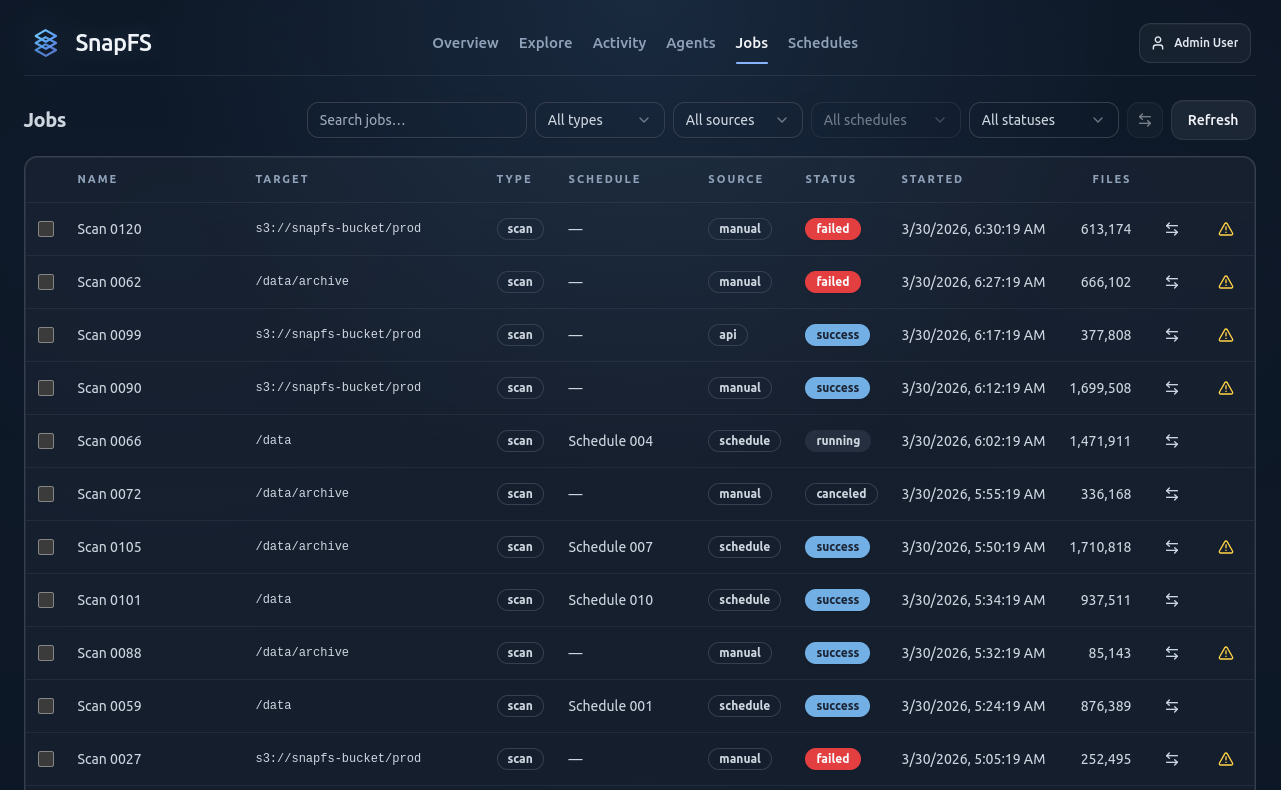
On the Job Details page you can review:
- status
- start and finish times
- files and bytes processed
- telemetry
- scan issues and error summaries
If you are using a long-running agent, you may trigger this first scan manually or let it run from a schedule. If you are using CLI-only scans, you can still use the same Jobs view to validate the result.
What To Look For
A healthy first scan should:
- complete successfully
- process the expected root or subpath
- show a plausible file count and byte count
- produce no surprising create/update/delete noise on an immediate rescan
Compare With Previous
After a second scan, use Compare to Previous to confirm that:
- no-change rescans stay quiet
- real creates, updates, and deletes appear where expected
If Something Looks Wrong
Check:
- the scan issue summary
- the error log
- the root and target path
- whether permissions or coverage problems were reported
If you are using a connected agent, also confirm that the agent root and configured path match what you intended to scan.
Next Step
Continue with Exploring Results.